Wednesday, August 4, 2010

Bathroom Remodel Complete!!!

Today I put the finishing touches on our bathroom remodel!
Sorry for the length of this post, but I am really proud of Kent and myself.

Remember the what the bathroom looked like before...


Not terrible, but look at it now:


Go ahead scroll back up and down again. Take a few minutes to really look at the transformation.

I have always heard bathroom remodels have one of the highest return on investments. My question to you is how much do you think this change will add to the value of our house?

Now how much would you guess this transformation cost us?

Do you have numbers in your head??

I don't know how much value it added to our house, and you are going to have to read on to see how much it cost.

To Kent and me it was a lot of money, and it is $400 over budget, but it was well worth it! Below are some photos of the details and the cost breakdown.

Cabinet organization. All of the accessories we purchased for the bathroom were $185

No more shell shaped sink. Its all about marble now! The marble, sink, and faucet cost $579. The highest cost. The plumbing cost $12.

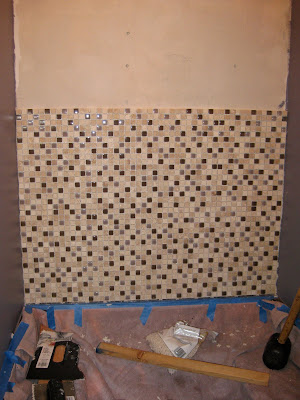
New floor tile! The floor and wall tile were the second highest cost, at $425

Here is our light fixture. All of the electrical work cost $84. (I laid down on the floor to take this picture).

The carpentry cost $28.
Paint cost $31.
Tools cost $37.

Everything I have read says that labor is the largest cost during a remodel. Well, our labor was free!!!

So the total cost for our entire bath remodel... drum roll please... $1,400.00

Pretty good for what we ended up with!

Tuesday, July 27, 2010

Bathroom Floor Tile

Today I installed the floor tile in the half bath. It literally took me all day to measure, cut, and install the tile. Cutting the tile was actually fun, thanks to the tile saw we borrowed from my Grandpa Bill. It was really easy and the cuts were perfect.


The hardest part was laying all of the tile without stepping on the ones that I already put down. To make sure the tiles were evenly spaced in the room, I had to start in the middle. If you can see the tile with the blue spacers laying on it, that is the one I started with. I then put down the tile above it, and worked my way to the left. Anyway, It was hard!
Kent and I were worried that the tiles would not be even, but I was able to get them pretty close to level. I tried really hard to follow all the directions and get the tile installed properly, but I am still worried they will crack. I guess we will just have to wait and see.


The room is really starting to come together.

Thursday, July 22, 2010

More Tile

I spend a lot of time today putting the remaining tile on the wall behind the vanity. I still need to grout and do some touch up painting, but I had to take more pictures!

Once I put the mirror up and get the faucet installed it is going to look great!


Here is the next issue I have to tackle. When I put the grout down, I don't want to fill the holes in the actual tiles. Not sure of the best way to achieve this, but I am sure the internet will provide me with some guidance.

Wednesday, July 21, 2010

Tile going up!!

Here is a quick update on our bathroom remodel. We order new tile, which took a long time to come in. While waiting on the tile, I painted and put up the new light. Below are some pictures.

Our new light! A major issue with the old bathroom is that there was no light over the sink. We decided that a track light was an easy solution to this problem. While shopping for lights we realized that a lot of track lighting looks dated. We also realized that the electrical for the light was not centered in the room. All our problems were solved when we found this light. This picture is looking toward the sink wall. The other end of the light only has two globes, fixing the not centered problem.

I finally started putting up the wall tile today!! Remember, this is the wall behind the sink. I covered the vanity with a towel to protect it, but the tile looks great with the marble vanity! I have only put two rows of tile up, and have three left. Its really exciting!

Close up of the tile. Can you tell where the seams are?? (If you can don't tell me). I went to Home Depot to buy tile spacers, but they did not having any that were the right size. I bought some and tried to make them work, but I had to eye-ball it in the end. I think I did a pretty good job for my first time!
I am not sure why, but some of the glass tile are tilted. They were like this before putting them on the wall, so I am trying to be happy with it.


Here is a close up of the problem we are having with the size of the tile. There is a gap between the tile and the side wall. The gap looks rather large here, but in reality it is a little larger than the space between the tiles. I placed the tile so there is a similar gap at the other wall as well. Once I get the grout in I am hoping the gaps will not be as noticeable.

What I have learned: Tiling is hard!

Friday, July 2, 2010

Bathroom Decisions

Kent and I finally got our marble countertop in for the half bath remodel. It is a gorgeous marble and we love it, but now we are doubting the tile that was our inspiration for this whole project. Below are a few pictures of the tile and the countertop.
Here are a couple of things to keep in mind: We will have a 4" marble back splash on all three sides of the countertop. The tile shown in the picture will be placed all the way up the wall behind the sink (if we decide to use it). This wall will have a mirror on it.
We have chosen a floor tile that is a light travertine. It matches the light stone in the wall tile.


In this picture the tile is still wrapped in plastic (in case we need to return it).

So, we are trying to decide whether we should go with the tile in the photos or a small version of the floor tile or just paint the wall or something else.

Thursday, June 10, 2010

Half Bath Remodel - Part One

Over the weekend Kent and I officially started remodeling our downstairs bathroom. It is a half bath so we are hoping it won't be too huge of a project. (We know it will be a lot of work, but hopefully we can get it done). Our list of improvements include, tile on the vanity wall, a new vanity top and sink, and new floor tile.
We are trying to do most of the work ourselves to keep the cost down.

Here is a before shot. If we have enough budget and materials we will also tile the portion of this wall above the shelf and below the cabinet. We will also put granite on the shelf.

Another before shot looking the other direction. We will be replacing this dated vanity top. Like I said we will be putting small glass subway tile on the wall behind the sink.

Kent had fun starting the demolition.

Picture after we removed the vanity and the drywall behind the sink. We had to take the drywall out so we can replace it with dura rock and tile over it.

Kent has had a lot of fun helping after work, but I have been doing a lot of the work while he is at work. Our next projects are to install the dura rock and get the granite measured and installed.
More later

Thursday, June 3, 2010

Dog Sitting

This week Kent and I are dog sitting for some friends. It has taken the dogs some time to adjust but they are getting along really well. The little white dog is named Tank and the large dog is named Zoe. Tank is still young and has a ton of energy, he also barks at anything that moves! Zoe is nine years old and is very calm.

Here are Tank (left) and Penny trying to get Zoe (right) to play. (Sorry about the rear-end shot)

They finally gave up on Zoe and started playing together. It is fun to watch. They run around our sofa as fast as they can, with Penny chasing Tank. After a few laps Penny gets wise and starts running the other direction so she can catch Tank.


Tank and Zoe taking over as look outs.

Saturday, May 29, 2010

Quick Update

It has been a while since we have done anything worth taking pictures and posting about. Kent has been in training for the past four weeks and I have been in Tulsa. Kent placed number 1 in Drilling Engineering School (big deal)! I am really proud of him.
Today he got a tank of gas for his welder and is going to be working on his car. I just looked outside and the temperature is around 95 degrees so I am looking forward to some indoor projects this weekend.
Next week we will be dog-sitting for some friends and starting the remodel of the downstairs bathroom. Expect lots of pictures of that!

Sunday, May 2, 2010

Home Updates

This past weekend Kent gave our old mailbox a makeover. First he stained the post and sprayed it with polyurethane. He did both of these with the spray gun he got to paint his car.
We bought a gray mailbox at Home Depot for $8 (we are the only ones in the neighborhood with a gray mailbox). We also bought reflective letters and put them on both sides of the post.

When my parents were in town a few weeks ago Kent and my dad did some work on the garage. Kent wants to finish the attic space in the garage so he can make it a livable space. The problem is that there was no way to support the weight. So, Kent and my dad built a header beam in the middle of the garage. They designed it in such a way that it does not interfere with anything on the garage floor.
Here Kent if on top of the new header panel putting on the finishing touches.

Dad observing and mom holding Kent's ladder.


A view of the entire panel. As you can see it does not interfere with anything!

Monday, April 19, 2010

Its Beginning to Look Better

Sunday Kent spent the entire day working on his civic. He continued the bondo work and had me help him tape off so he could paint. It probably took us over an hour to get the entire car taped off. After mixing the paint, it probably only took him about 30 minutes to paint the entire thing. It was pretty fun to watch.


Below are several pictures of the car after the paint was dry. Kent really wanted to put another coat on, but I would not let him. He still has bondo work to do in the passenger side door. After he completes the bondo work he will have to repaint the entire car, so it does not make sense to put another layer on now.

Below is a picture of Kent taking off the tape he put on his headlights. You can see how daring and artist he got with the paint job. He taped over most of the headlights and left a small amount on top exposed to the paint. I think it looks pretty cool now that it is painted.

Here is the car with all the paint removed. As I said above the car still needs work, but anyone who has seen the civic in the past now that it looks better than it has. You can see on the hood where the bondo absorbed paint differently than the rest of the car. You can also see the 'zebra stripes' where the thickness of the paint varied too much. It is a good thing that Kent has the civic to practice all of these skills on. Notice that Penny likes sitting in the car while we work in the garage.

Sunday, April 18, 2010

And You Thought It Couldn't Look Worse

Friday Kent came home with a paint sprayer from Harbor Freight. He decided the civic needed a better paint job. Since it was most recently painted with black spray paint I could not have agreed more. Kent sprayed one fender Friday night, and then decided that the body panels could have been straighter so he bought some Bondo.
So Saturday bondo work was our project. Kent wanted to straighten out the body line on the bottom portion of the passenger door. I tried to convince him that it would be too much work, but he got me on board by telling me it is good practice for when we start working on the '68 charger. Below are a few pictures of the work in progress.

It looks pretty terrible at the moment, but will look great once he puts paint on it. It has been raining all day today which has slowed down the progress. Hopefully he will get it in paint tonight so he has a car he can drive to work!

Saturday, April 17, 2010

Backyard Makeover

Kent and I have been really busy with our house lately. We have been putting down cedar mulch and putting in some plants. Last weekend we were pulling up weeds in the backyard and Kent decided to remove the old satellite dish from one of the flower beds. He started digging around the dish and quickly realized he needed my help.
It turns out that who ever installed the dish bought an 8 foot pole to put it on, and instead of cutting the pole they dug a huge hole and filled it with concrete. It is hard to tell how deep we had to dig in this photo, but it got so deep that I could barely reach the bottom to pull more dirt out. It was hard work, but after 4 hours and some very muddy clothes we no longer have a satellite dish in our back yard.

Another big project. The last time Kent's parents came to visit they brought us this old patio furniture. It had belonged to a family friend and needs to be reupholstered. We are really excited to have something on our patio! We now have a table, 4 chairs, and a chaise lounge!

Kent's parents also brought us some fabric to redo the chairs with. I have made two seats so far. It probably took me over an hour to Kent the old fabric off and the new fabric on, but the chair looks great! The only problem is that this new fabric is not made specifically for chairs like this, it is more for cushions. So when you sit in the chair you sink about 2 inches and can feel the frame of the chair. It is not terribly uncomfortable, but its still not how it should be. We aren't sure how we are going to fix this situation. We may have to buy the proper fabric, which is about $30/yard. ouch!


Penny loves being outside hunting lizards!

Wednesday, March 24, 2010

Vegas Vacation!

Over Spring Break Kent and I met some friends in Las Vegas. We had a blast and can't wait to go back! Below is a photo journal of our trip.

The hallway of my new favorite hotel in the world! Reminds me of Audrey Hepburn.
We did not reservations for Thursday night and luckily the El Cortez had room. We stayed in their new building and had to put down a $200 deposit just in case we hurt anything. Luckily we got that money back!

I really liked the colors and the door!!

Kent and I have decided that we are going to remodel our bathroom to look exactly like this one!

Kent really like the huge tv! They had full cable, pretty amazing for a Vegas hotel at $50/night.

Amazing headboard and wall treatment! Love it so much!!!
The website for El Cortez is http://www.ecvegas.com/. We stayed in the Cabana Suites.

On top of the Stratosphere with the Strip in the background. We stayed at the Stratosphere two nights. This hotel is at the north end of the Strip. I don't even know how many miles we ended up walking to see everything.

In front of Paris Las Vegas. This was a really neat casino. I just wish it wasn't so expensive to stay in the hotel.

In front of the Treasure Island pirate ship. We missed the show by about 15 minutes. Kent and I decided that we will check the show next time we are in Vegas.

At the end of our vacation we went to Front Sight (http://www.frontsight.com/). I was nervous about the two day class, because I had never really shot a gun. However, it was probably one of the coolest things I have ever done! We learned how to safely and responsibly handle a handgun. I really recommend this course to anyone!

Sunday, March 14, 2010

Kent's parents and brother were in town this weekend for a wedding. After the wedding celebration was over, they hurried back to our house and began working on car/garage projects.
These projects take up a lot of room.

Kent and his brother are building custom headers for the Mercedes. Instead of buying a set of headers, they are cutting apart several old headers and are welding them together. Everyone thinks Kent is crazy for making his Mercedes faster, but it is what he loves. Although at this point I think he just wants to prove that he can build a set of headers
Kent (right) and Neil reviewing their welding skills.
Neil showing off their work.
Trying to see if it will still fit on the engine.

While the two brothers were working on the headers, Kent's dad got busy on the garage. Last time he was here Kent helped him run more electrical from the house to the garage. Today Kent's dad starting running the electrical lines in the garage. I think we will end up with an electrical outlet every 4-5 feet, which will be great when Kent is working on cars.

Check out all the blue electrical boxes!

While the guys were busy with their projects, I fixed a broken chair and a broken shelf and researched what type of plants do best in our area.
Kent is taking off work tomorrow, so I am sure I will have more to report!